Bootstrap Popover Template
Overview
The versions
Bootstrap is one of the greatest free of cost and handy open-source solutions to build internet sites. The latest version of the Bootstrap operating system is named the Bootstrap 4. The system is presently in its alpha-testing stage and yet is accessible to internet developers throughout the world. You may even make and suggest changes to the Bootstrap 4 just before its final version is launched.
Application of the Bootstrap 4
With Bootstrap 4 you can surely create your web site now much faster than ever. It is quite very simpler to apply Bootstrap to build your site than various other platforms. By having the integration of HTML, CSS, and JS framework it is among the most leading platforms for website growth.
Certain capabilities plus tips in Bootstrap 4
A couple of the finest functions of the Bootstrap 4 include:
• An improved grid complex which helps the user to get mobile device responsive with a fair level of ease.
• A number of utility instruction sets have been involved in the Bootstrap 4 to help with uncomplicated studying for new users in the business of web building.
Items to bear in mind
Step 2: Rewrite your article by highlighting words and phrases.
Along with the launch of the brand-new Bootstrap 4, the ties to the older version, Bootstrap 3 have not been totally removed. The designers have made certain that the Bootstrap 3 does get frequent improve and fault resolve as well as renovations. It will be done even after the ultimate produce of the Bootstrap 4. Bootstrap 3 have not been entirely cut off. The developers has guaranteed that the Bootstrap 3 does get regular improve and bug fixes along with improvements.
Contrasts between Bootstrap 4 and Bootstrap 3
• The help for various browsers together with managing systems has been provided in the Bootstrap 4
• The overall sizing of the font is enhanced for comfortable watching and web-site construction practical experience
• The renaming of a variety of components has been performed to make sure a speedier and more dependable web-site development system
• Using new customizations, it is attainable to generate a extra active web site with minimal efforts
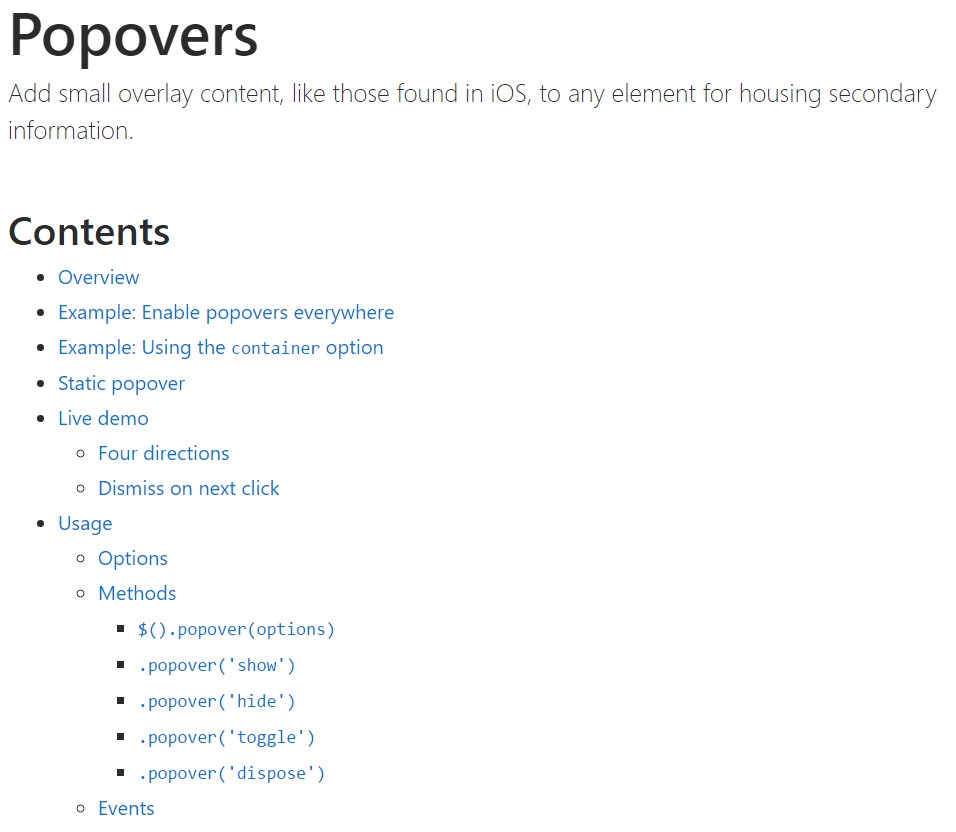
Bootstrap Popover Example
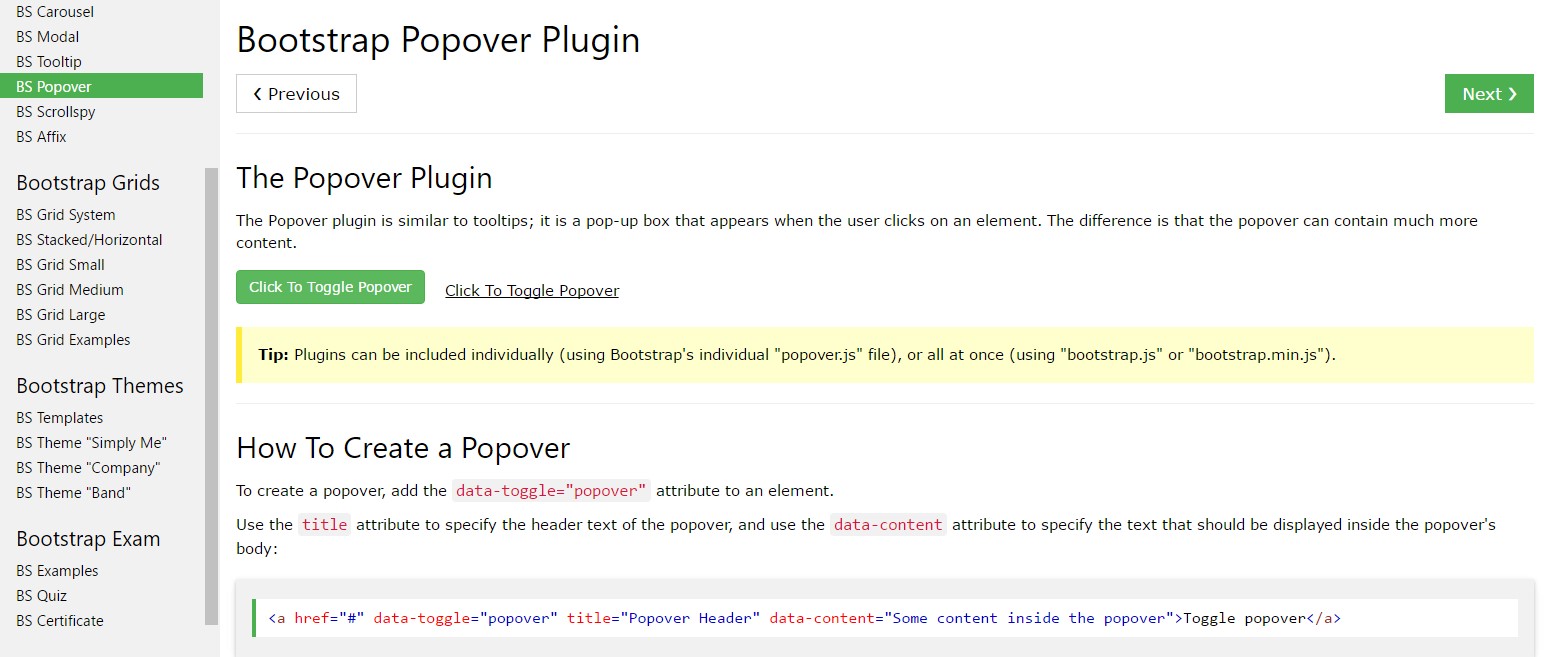
And promptly let all of us arrive at the major topic.
If you like to add in special supporting information on your internet site you can surely apply popovers - simply bring in small-sized overlay content.
Ways to utilize the popover plugin:
- Bootstrap Popover Placement depend upon the Third party library Tether for installing. You must absolutely include tether.min.js previous to bootstrap.js straight for popovers to function!
- Popovers require the tooltip plugin being a dependency .
- Popovers are opt-in for functioning factors, and so you will need to initialize them by yourself.
- Zero-length
titlecontent- Indicate
container:'body'- Generating popovers on hidden components will just not run.
- When triggered directly from weblinks that span several lines, popovers are going to be centered. Employ
white-space: nowrap;<a>Did you figured out? Excellent, why don't we discover specifically how they operate by using some scenarios. ( useful source)
You have to incorporate tether.min.js just before bootstrap.js in order for popovers to perform!
Good example: Implement popovers everywhere
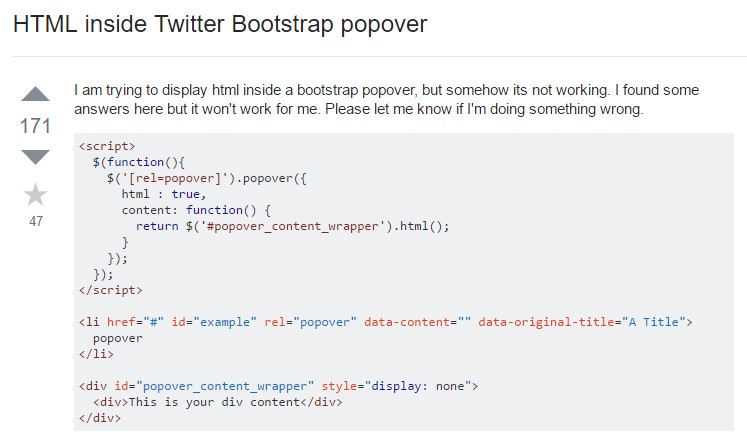
One approach to initialize all of the popovers on a web page would be to pick them by their
data-toggle$(function ()
$('[data-toggle="popover"]').popover()
)Good example: Working with the container possibility
Every time you possess certain designs on a parent element which intrude with a popover, you'll really want to define a custom
container$(function ()
$('.example-popover').popover(
container: 'body'
)
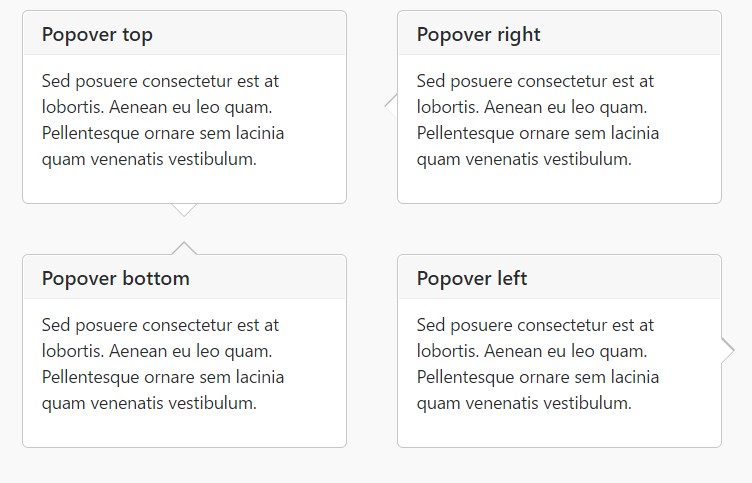
)Static popover
Four options are offered: top, right, lowest part, and left straightened.
Live demonstration
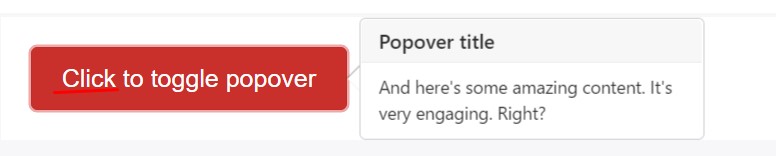
<button type="button" class="btn btn-lg btn-danger" data-toggle="popover" title="Popover title" data-content="And here's some amazing content. It's very engaging. Right?">Click to toggle popover</button>Four positions
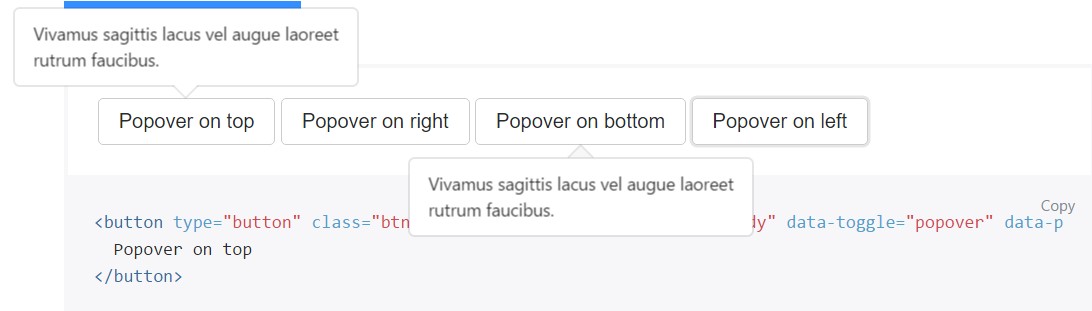
<button type="button" class="btn btn-secondary" data-container="body" data-toggle="popover" data-placement="top" data-content="Vivamus sagittis lacus vel augue laoreet rutrum faucibus.">
  Popover on top
</button>

<button type="button" class="btn btn-secondary" data-container="body" data-toggle="popover" data-placement="right" data-content="Vivamus sagittis lacus vel augue laoreet rutrum faucibus.">
  Popover on right
</button>

<button type="button" class="btn btn-secondary" data-container="body" data-toggle="popover" data-placement="bottom" data-content="Vivamus
sagittis lacus vel augue laoreet rutrum faucibus.">
  Popover on bottom
</button>

<button type="button" class="btn btn-secondary" data-container="body" data-toggle="popover" data-placement="left" data-content="Vivamus sagittis lacus vel augue laoreet rutrum faucibus.">
  Popover on left
</button>
Dismiss upon following mouse click
Utilize the
focusSpecialised markup required for dismiss-on-next-click
For right cross-browser and cross-platform actions, you have to operate the
<a><button>tabindex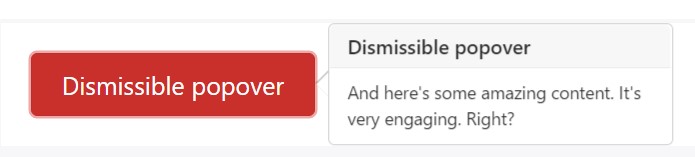
<a tabindex="0" class="btn btn-lg btn-danger" role="button" data-toggle="popover" data-trigger="focus" title="Dismissible popover" data-content="And here's some amazing content. It's very engaging. Right?">Dismissible popover</a>$('.popover-dismiss').popover(
trigger: 'focus'
)Usage
Prepare popovers through JavaScript
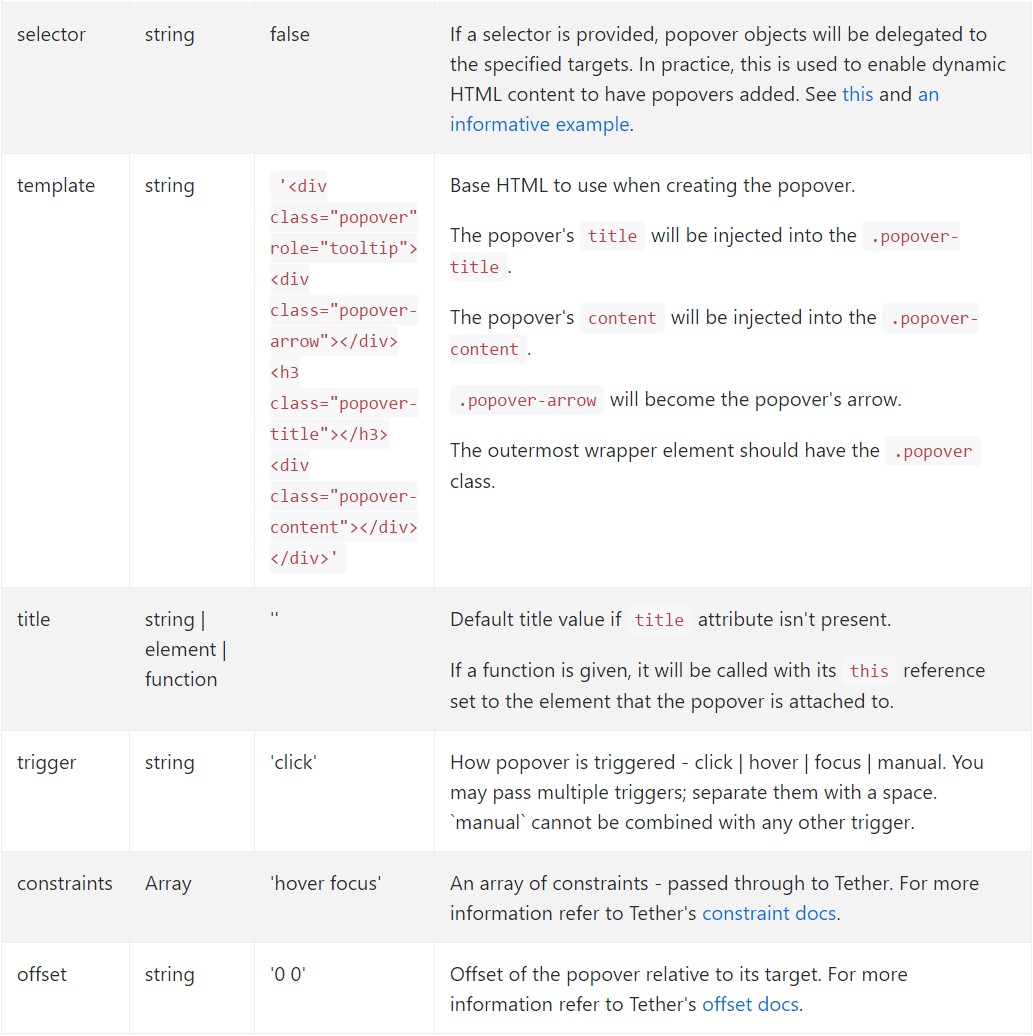
$('#example').popover(options)Features
Options can possibly be completed by using information attributes or else JavaScript. For information attributes, add the option name to
data-data-animation=""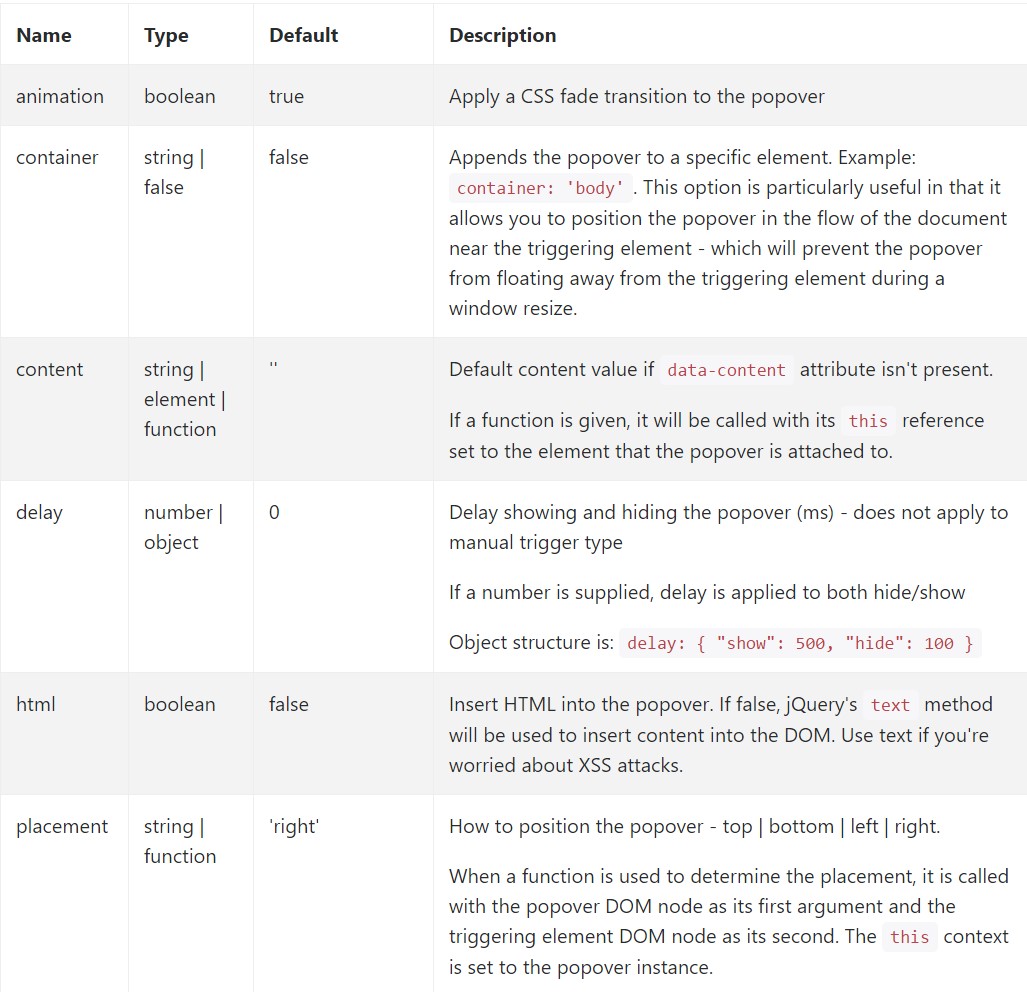
Information attributes for separate popovers
Selections for specific popovers have the ability to alternatively be indicated throughout the use of data attributes, as revealed above.
Solutions
$().popover(options)
Initializes popovers for the element variety.
.popover('show')
Shows an element's popover. Come back to the caller just before the popover has actually been displayed (i.e. before the shown.bs.popover
event takes place). This is viewed a "manual" triggering of the popover. Popovers whose both the title and material are zero-length are never presented.
$('#element').popover('show')
.popover('hide')
Conceals an element's popover. Come back to the caller before the popover has really been disguised (i.e. right before the hidden.bs.popover
activity takes place). This is considered a "manual" triggering of the popover.
$('#element').popover('hide')
.popover('toggle')
Activate an element's popover. Goes back to the caller prior to the popover has really been shown or disguised (i.e. prior to the shown.bs.popover
or hidden.bs.popover
event happens). This is taken into consideration a "manual" triggering of the popover.
$('#element').popover('toggle')
.popover('dispose')
Hides and destroys an element's popover. Popovers that put into action delegation (which are created making use of the selector option) can not actually be individually wiped out on descendant trigger components.
$('#element').popover('dispose')
Events
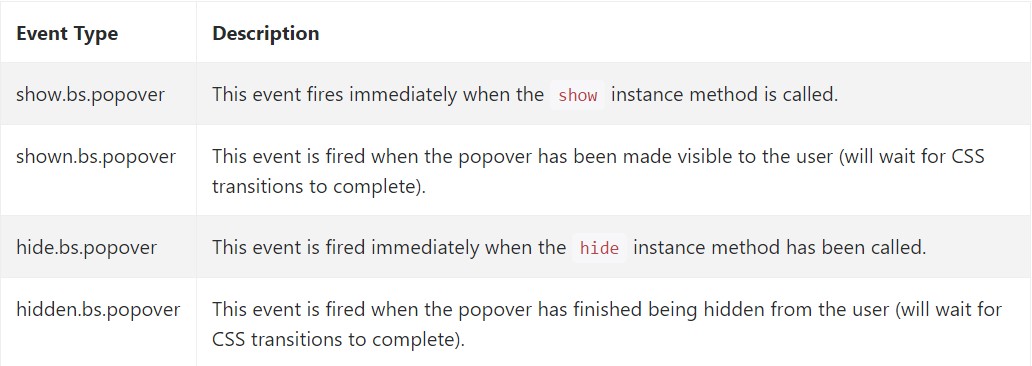
$('#myPopover').on('hidden.bs.popover', function ()
  // do something…
)
Examine a couple of online video guides relating to Bootstrap popovers
Connected topics:
Bootstrap popovers main information
Bootstrap popovers article
Bootstrap Popover difficulty
$().popover(options)
Initializes popovers for the element variety.
$().popover(options).popover('show')
Shows an element's popover. Come back to the caller just before the popover has actually been displayed (i.e. before the .popover('show')shown.bs.popover$('#element').popover('show').popover('hide')
Conceals an element's popover. Come back to the caller before the popover has really been disguised (i.e. right before the .popover('hide')hidden.bs.popover$('#element').popover('hide').popover('toggle')
Activate an element's popover. Goes back to the caller prior to the popover has really been shown or disguised (i.e. prior to the .popover('toggle')shown.bs.popoverhidden.bs.popover$('#element').popover('toggle').popover('dispose')
Hides and destroys an element's popover. Popovers that put into action delegation (which are created making use of the selector option) can not actually be individually wiped out on descendant trigger components.
.popover('dispose')$('#element').popover('dispose')Events
$('#myPopover').on('hidden.bs.popover', function ()
// do something…
)Examine a couple of online video guides relating to Bootstrap popovers
Connected topics:
Bootstrap popovers main information
Bootstrap popovers article
Bootstrap Popover difficulty